
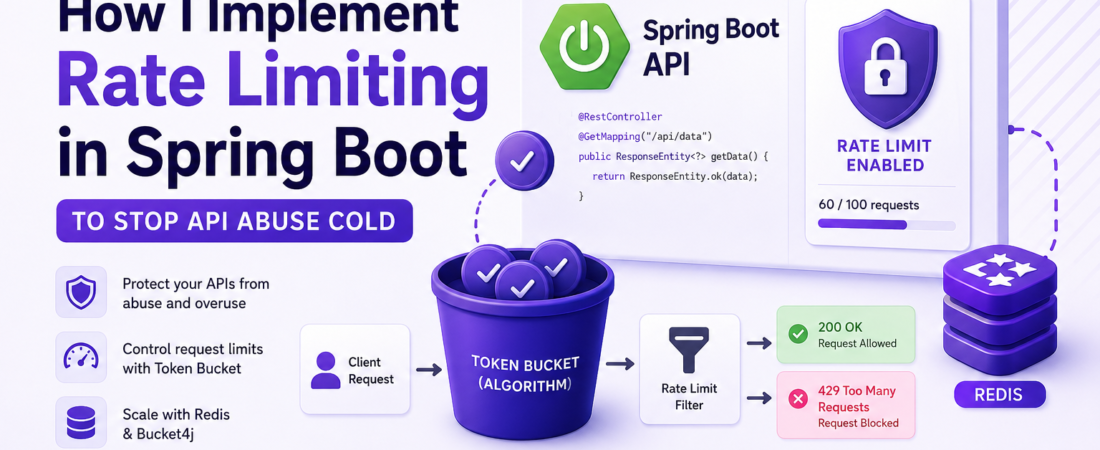
Meta Description: Learn how I implement rate limiting in Spring Boot using Bucket4j, Redis, and custom filters to protect production APIs from abuse.
The first time I watched a single misbehaving client script take down a production API I was responsible for, I learned a lesson I never forgot: without rate limiting, one bad actor — or even one buggy internal job — can degrade service for everyone else on the platform. That incident is the reason I now treat rate limiting as a non-negotiable part of any public-facing Spring Boot API, not an afterthought I bolt on after something breaks.
In this guide, I’m going to walk you through every approach I’ve actually used in production: from a simple in-memory filter you can drop into a side project this afternoon, to a distributed Redis-backed solution that scales across multiple instances behind a load balancer. I’ll show you real code, explain the tradeoffs of each approach, and cover the mistakes that cost me hours of debugging so you don’t have to repeat them.
What Rate Limiting Actually Is (and Why It’s Not Optional)
Rate limiting is the practice of controlling how many requests a client — identified by IP address, API key, user ID, or some other identifier — can make to your API within a given time window. Once that client exceeds the limit, your API responds with an HTTP 429 Too Many Requests status instead of processing the request.
In my experience, teams reach for rate limiting for four main reasons:
- Abuse prevention — stopping scrapers, credential-stuffing bots, and malicious scripts from hammering your endpoints.
- Fair usage — making sure one tenant in a multi-tenant system can’t starve resources from everyone else.
- Cost control — especially relevant when your endpoints call metered downstream services (AI APIs, SMS providers, payment processors).
- Stability under load — protecting your database and downstream dependencies from being overwhelmed by traffic spikes, intentional or not.
I’ve used rate limiting for all four reasons at different points, and honestly, reason #3 is the one that bites teams the hardest once they start integrating with pay-per-call APIs like OpenAI or Twilio.
The Algorithms Behind Rate Limiting
Before touching code, it helps to understand the algorithm you’re actually implementing. I’ve tested all of these in real projects, and each has a distinct behavior under bursty traffic.
| Algorithm | How it works | Burst handling | Complexity | Best for |
|---|---|---|---|---|
| Fixed Window | Counts requests in a fixed time block (e.g., per minute) | Poor — allows 2x limit at window edges | Low | Simple internal tools |
| Sliding Window Log | Stores a timestamp per request | Excellent — very accurate | High (memory heavy) | Low-traffic, high-precision needs |
| Sliding Window Counter | Approximates sliding window using weighted counts | Good | Medium | General-purpose APIs |
| Token Bucket | Tokens refill at a fixed rate; each request consumes one | Excellent — allows controlled bursts | Medium | Most production APIs (what I use most) |
| Leaky Bucket | Requests processed at a constant outflow rate | Smooths traffic completely | Medium | Queue-like processing, traffic shaping |
I default to the token bucket algorithm for most Spring Boot APIs I build. It allows short, legitimate bursts (a user double-clicking a button, a client retrying with backoff) without letting sustained abuse through. That’s exactly what Bucket4j — the library I’ll use in the main example below — implements.
Approach 1: Simple In-Memory Rate Limiting with Bucket4j
For a single-instance application, or as a first pass before you need distributed limits, Bucket4j with an in-memory cache is the fastest path to a working rate limiter. Here’s how I set it up.
Step 1: Add the Dependency
<dependency>
    <groupId>com.bucket4j</groupId>
    <artifactId>bucket4j_jdk17-core</artifactId>
    <version>8.10.1</version>
</dependency>
Note: Bucket4j’s artifact naming has changed across major versions (it used to be bucket4j-core pre-8.x). If you’re on an older Spring Boot / JDK version, check the Bucket4j GitHub releases page for the artifact that matches your JDK target before pinning a version.
Step 2: Create a Rate Limiter Service
@Service
public class RateLimiterService {

    // Cache of buckets, one per client key (e.g., IP address or API key)
    private final Map<String, Bucket> buckets = new ConcurrentHashMap<>();

    public Bucket resolveBucket(String key) {
        return buckets.computeIfAbsent(key, this::newBucket);
    }

    private Bucket newBucket(String key) {
        // Allow 20 requests, refilling at 20 requests per minute
        Bandwidth limit = Bandwidth.classic(20,
                Refill.greedy(20, Duration.ofMinutes(1)));
        return Bucket.builder()
                .addLimit(limit)
                .build();
    }
}
A few things I want to call out here because they trip people up:
ConcurrentHashMapis important — you’ll have concurrent requests hitting this service from multiple threads under Spring’s default thread-per-request model.Refill.greedyrefills tokens as soon as possible up to the limit, which is what most APIs want.Refill.intervallyrefills all tokens at once at the end of the interval — I’ve used this for stricter “N requests per exact minute” business rules, but it creates a thundering-herd effect at refill time.- This in-memory map will grow unbounded if you have a huge number of unique keys (e.g., rate limiting by IP with no cleanup). In production I pair this with a scheduled eviction job or switch to a bounded cache like Caffeine.
Step 3: Wrap It in a Servlet Filter
I prefer applying rate limiting in a filter so it runs before the request reaches any controller logic — this saves CPU and database calls that would otherwise be wasted on a request you’re about to reject anyway.
@Component
public class RateLimitFilter extends OncePerRequestFilter {

    private final RateLimiterService rateLimiterService;

    public RateLimitFilter(RateLimiterService rateLimiterService) {
        this.rateLimiterService = rateLimiterService;
    }

    @Override
    protected void doFilterInternal(HttpServletRequest request,
                                     HttpServletResponse response,
                                     FilterChain filterChain)
            throws ServletException, IOException {

        String clientKey = resolveClientKey(request);
        Bucket bucket = rateLimiterService.resolveBucket(clientKey);

        ConsumptionProbe probe = bucket.tryConsumeAndReturnRemaining(1);

        if (probe.isConsumed()) {
            response.addHeader("X-Rate-Limit-Remaining",
                    String.valueOf(probe.getRemainingTokens()));
            filterChain.doFilter(request, response);
        } else {
            long waitForRefillSeconds = probe.getNanosToWaitForRefill() / 1_000_000_000;
            response.setStatus(429);
            response.addHeader("X-Rate-Limit-Retry-After-Seconds",
                    String.valueOf(waitForRefillSeconds));
            response.setContentType("application/json");
            response.getWriter().write(
                "{\"error\": \"Too many requests. Try again in " +
                waitForRefillSeconds + " seconds.\"}"
            );
        }
    }

    private String resolveClientKey(HttpServletRequest request) {
        // In production, prefer an authenticated identifier (API key, user ID)
        // over raw IP, since IPs can be shared behind NATs/proxies
        String apiKey = request.getHeader("X-API-Key");
        if (apiKey != null && !apiKey.isBlank()) {
            return apiKey;
        }
        return request.getRemoteAddr();
    }
}
Pro tip: Always send back the standard rate-limit headers (
X-Rate-Limit-Remaining,Retry-After) even on success. Well-behaved API clients — and most HTTP libraries — will read these and throttle themselves proactively, which reduces the number of 429s you actually have to serve.
Step 4: Register the Filter
@Configuration
public class FilterConfig {

    @Bean
    public FilterRegistrationBean<RateLimitFilter> rateLimitFilterRegistration(
            RateLimitFilter filter) {
        FilterRegistrationBean<RateLimitFilter> registration = new FilterRegistrationBean<>(filter);
        registration.addUrlPatterns("/api/*");
        registration.setOrder(1); // run early, before auth if you want to rate limit unauthenticated abuse too
        return registration;
    }
}
This gives you a fully working, single-instance rate limiter. It’s genuinely enough for a lot of side projects and internal tools. The limitation shows up the moment you scale horizontally.
Approach 2: Distributed Rate Limiting with Redis
Here’s the problem I ran into after deploying the in-memory version behind a load balancer with three instances: a client could get 20 requests per minute per instance, effectively tripling their real limit, because each instance kept its own bucket in memory. If your rate limit needs to be enforced globally across all instances, you need shared state — and Redis is the tool I reach for.
Step 1: Add Dependencies
<dependency>
    <groupId>com.bucket4j</groupId>
    <artifactId>bucket4j_jdk17-redis</artifactId>
    <version>8.10.1</version>
</dependency>
<dependency>
    <groupId>org.springframework.boot</groupId>
    <artifactId>spring-boot-starter-data-redis</artifactId>
</dependency>
<dependency>
    <groupId>redis.clients</groupId>
    <artifactId>jedis</artifactId>
</dependency>
Step 2: Configure the Redis-Backed Proxy Manager
@Configuration
public class RedisRateLimitConfig {

    @Bean
    public JedisPool jedisPool(@Value("${redis.host}") String host,
                                @Value("${redis.port}") int port) {
        return new JedisPool(host, port);
    }

    @Bean
    public ProxyManager<String> proxyManager(JedisPool jedisPool) {
        return Bucket4jJedis.casBasedBuilder(jedisPool)
                .expirationAfterWrite(
                        ExpirationAfterWriteStrategy.basedOnTimeForRefillingBucketUpToMax(
                                Duration.ofMinutes(2)))
                .build();
    }
}
Step 3: Resolve Buckets Through Redis Instead of a Local Map
@Service
public class DistributedRateLimiterService {

    private final ProxyManager<String> proxyManager;

    public DistributedRateLimiterService(ProxyManager<String> proxyManager) {
        this.proxyManager = proxyManager;
    }

    public Bucket resolveBucket(String key) {
        Supplier<BucketConfiguration> configSupplier = () -> BucketConfiguration.builder()
                .addLimit(Bandwidth.classic(20, Refill.greedy(20, Duration.ofMinutes(1))))
                .build();

        return proxyManager.builder().build(key, configSupplier);
    }
}
The filter code from Approach 1 barely changes — you just swap RateLimiterService for DistributedRateLimiterService. That’s one thing I really appreciate about Bucket4j’s design: the Bucket interface stays identical whether the backing store is local memory or Redis.
What This Costs You
I want to be upfront about the tradeoff: distributed rate limiting adds a network round-trip to Redis on every request. In my testing, this typically adds 1-3ms of latency on a co-located Redis instance, which is negligible for most APIs but worth measuring under your actual load if you’re operating with tight P99 latency budgets.
Approach 3: Rate Limiting at the Gateway Level with Spring Cloud Gateway
If you’re running a microservices architecture, I usually push rate limiting up to the gateway layer instead of implementing it in every individual service. Spring Cloud Gateway has a built-in RequestRateLimiter filter that uses Redis under the hood with a token bucket algorithm identical in spirit to what we built above.
spring:
  cloud:
    gateway:
      routes:
        - id: orders_api
          uri: lb://orders-service
          predicates:
            - Path=/api/orders/**
          filters:
            - name: RequestRateLimiter
              args:
                redis-rate-limiter.replenishRate: 20
                redis-rate-limiter.burstCapacity: 40
                redis-rate-limiter.requestedTokens: 1
                key-resolver: "#{@apiKeyResolver}"
@Bean
public KeyResolver apiKeyResolver() {
    return exchange -> Mono.justOrEmpty(
        exchange.getRequest().getHeaders().getFirst("X-API-Key")
    ).switchIfEmpty(Mono.just("anonymous"));
}
I like this approach because it centralizes the policy — you’re not duplicating rate-limit logic across a dozen microservices, and product/ops teams can tune limits without redeploying backend services. The downside is you’re now dependent on the gateway being correctly configured and healthy; a misconfigured gateway limit affects every downstream service at once.
Comparing the Three Approaches
| Approach | Scales horizontally? | Setup complexity | Extra infrastructure | Best for |
|---|---|---|---|---|
| In-memory Bucket4j | No | Low | None | Single instance, side projects, internal tools |
| Redis-backed Bucket4j | Yes | Medium | Redis | Multi-instance monoliths, small microservice setups |
| Spring Cloud Gateway | Yes | Medium-High | Redis + Gateway | Full microservices architectures |
Common Mistakes I’ve Made (So You Don’t Have To)
Rate limiting by IP address only. This breaks down fast behind corporate NATs, mobile carrier CGNAT, and shared office networks, where hundreds of legitimate users share one IP. I learned this the hard way when a partner company’s entire office got rate-limited because their whole team shared one outbound IP. Prefer API keys or authenticated user IDs whenever you can.
Forgetting to rate limit before authentication. If your login endpoint isn’t rate limited, you’ve left the door open for credential-stuffing attacks regardless of how well-protected your other endpoints are.
Returning a generic 500 instead of a 429. Clients — and monitoring dashboards — need to distinguish “you’re being throttled, back off” from “the server is broken.” Always return 429 with a Retry-After header.
No differentiation between endpoint costs. A GET /health check and a POST /reports/generate that triggers a heavy database aggregation shouldn’t share the same limit. In one project, I ended up defining per-endpoint bandwidth limits rather than a single global one, keyed by both client and route.
Not load testing the rate limiter itself. After deploying Redis-backed rate limiting, I always run a load test (I use Gatling or k6) specifically hitting the rate-limited endpoints to confirm the limiter behaves correctly under concurrent load — race conditions in naive custom implementations are a real risk, which is exactly why I recommend using a battle-tested library like Bucket4j instead of hand-rolling the counting logic.
Security Considerations
Rate limiting is a security control, not just a performance one, so I treat it with the same care as authentication:
- Don’t leak exact limits in error responses if your API is a target for attackers probing for the exact threshold — a generic message is often safer than an overly detailed one.
- Apply stricter limits to unauthenticated endpoints (signup, login, password reset) than to authenticated ones, since these are the endpoints most attractive to bots.
- Combine rate limiting with other defenses. Rate limiting slows down brute-force and scraping attempts, but it’s not a substitute for proper input validation, authentication, and WAF-level protections.
Performance Checklist Before You Ship
- [ ] Rate limiter runs early in the filter chain, before expensive logic
- [ ] Client key resolution prefers authenticated identity over raw IP
- [ ] 429 responses include
Retry-Afterand remaining-quota headers - [ ] Distributed setups use Redis (or equivalent) instead of in-memory state
- [ ] Different endpoints have appropriately different limits based on cost
- [ ] Load tested under realistic concurrent traffic
- [ ] Monitoring/alerting in place for sustained 429 spikes (a sign of either an attack or a limit set too aggressively)
Frequently Asked Questions
What is the best way to implement rate limiting in Spring Boot? For most production APIs, I recommend Bucket4j with the token bucket algorithm, implemented as a servlet filter for single-instance apps or backed by Redis for multi-instance deployments. It’s well-tested, actively maintained, and avoids the concurrency bugs that come with hand-rolled counters.
Does Spring Boot have built-in rate limiting? Spring Boot itself doesn’t ship built-in rate limiting for standard REST controllers. Spring Cloud Gateway does include a RequestRateLimiter filter, but that’s part of Spring Cloud, not core Spring Boot, and it requires Redis.
What HTTP status code should a rate-limited request return? 429 Too Many Requests, as defined in RFC 6585. I always pair it with a Retry-After header telling the client how long to wait before retrying.
How do I rate limit by user instead of by IP address? Resolve the rate-limit key from an authenticated identifier — a JWT claim, session user ID, or API key header — instead of request.getRemoteAddr(). This is what I do for any endpoint behind authentication, since IPs are unreliable identifiers.
Can I use rate limiting and API throttling interchangeably? In casual usage, yes — most developers use the terms interchangeably. Technically, “throttling” sometimes implies slowing requests down (queueing) rather than rejecting them outright, while “rate limiting” usually implies outright rejection past the threshold. Bucket4j and the approaches in this guide implement rate limiting in the strict sense.
How do I test rate limiting locally before deploying? I write a simple integration test using Spring’s MockMvc or a load-testing tool like k6, firing more requests than the configured limit in a short window and asserting that the (N+1)th request returns a 429. For Redis-backed limiters, I run Redis locally via Docker (docker run -p 6379:6379 redis) as part of my test setup.
Wrapping Up
Rate limiting isn’t glamorous work, but it’s one of those things that separates a hobby API from a production-grade one. Start simple — an in-memory Bucket4j filter will get you 90% of the way there for most small-to-mid traffic APIs. Move to Redis-backed limiting the moment you scale past a single instance, and consider pushing the policy up to a gateway once you’re running enough microservices that duplicating the logic everywhere becomes a maintenance burden itself.
If you found this useful, take a look at some of the other backend and API security guides here on SpiritCode — I’ve got deep dives on authentication patterns, caching strategies, and production debugging techniques that pair well with everything covered here. And if you’re building anything AI-powered on top of your Spring Boot backend, don’t miss my companion guide on building a custom chatbot with the OpenAI API and LangChain.