
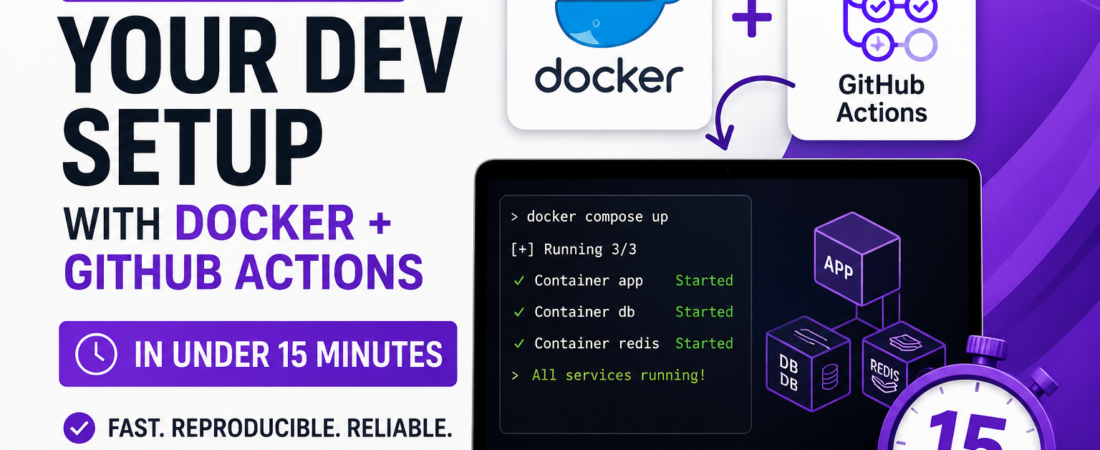
If you’ve ever joined a new project and spent your entire first day just trying to get the codebase running locally, you already know the pain I’m talking about. Missing environment variables, a Node version mismatch, a database that “works on my machine” — I’ve lost entire afternoons to this before I finally forced myself to fix it properly.
In this guide, I’ll walk you through exactly how I automated my local development environment using Docker and GitHub Actions. This isn’t a theoretical overview — it’s the same setup I use on real projects today, and you can have it running in under 15 minutes.
Quick Answer: How to Automate a Local Dev Environment with Docker
Here’s the short version if you’re in a hurry:
- Write a
Dockerfilethat defines your app’s runtime, dependencies, and startup command. - Use
docker-compose.ymlto orchestrate your app alongside services like databases and caches. - Add a
.github/workflows/ci.ymlfile so GitHub Actions builds and tests the same containers on every push. - Run
docker compose uplocally to get the exact same environment your CI pipeline uses.
That’s the whole idea: one source of truth for your environment, used both on your laptop and in CI. Let’s build it step by step.
Why I Stopped Relying on “Setup Instructions” in a README
Early in my career, I maintained a README with setup instructions that were outdated within a month. New dependencies got added, someone upgraded Postgres, and the README just… didn’t keep up. In my experience, documentation drifts. Code doesn’t — as long as it’s the thing actually running.
Docker solves this because your environment becomes executable. Instead of telling a new teammate “install Node 20, Postgres 15, and Redis, then run these three commands,” you hand them one file: docker-compose.yml. They run one command. Done.
GitHub Actions extends this same idea into your CI/CD pipeline, so the environment that tests your code is identical to the one you develop in. No more “it passed locally but failed in CI.”
Prerequisites
Before you start, make sure you have:
- Docker Desktop (or Docker Engine on Linux) installed and running
- A GitHub repository for your project
- Basic familiarity with the command line
- About 15 minutes
I’ll use a simple Node.js + Express + PostgreSQL app as the example, but the same pattern applies to Python, Go, Ruby, or any stack.
Step 1: Write a Production-Grade Dockerfile
Here’s the Dockerfile I typically start with for a Node.js project:
# Use a specific version, never "latest" — I learned this the hard way
# after a silent breaking change took down a staging build
FROM node:20.11-alpine AS base

WORKDIR /app

# Copy only package files first to leverage Docker layer caching
COPY package*.json ./
RUN npm ci --omit=dev

# Copy the rest of the source code
COPY . .

# Non-root user for better security posture
USER node

EXPOSE 3000

CMD ["node", "server.js"]
A few things worth explaining line by line, since the “why” matters more than the “what”:
FROM node:20.11-alpine— I pin an exact version instead ofnode:latest. Alpine images are also significantly smaller, which speeds up both local builds and CI runs.- Copying
package*.jsonbefore the rest of the code — this lets Docker cache thenpm cilayer. If you only change application code (not dependencies), rebuilds take seconds instead of minutes. npm ciinstead ofnpm install—ciinstalls exactly what’s inpackage-lock.json, which guarantees reproducibility. This single change eliminated an entire category of “works on my machine” bugs for me.USER node— running as a non-root user inside the container is a small step that meaningfully reduces your attack surface if the container is ever compromised.
Step 2: Orchestrate Everything with docker-compose
Most real applications aren’t just one service — you’ve got a database, maybe a cache, maybe a message queue. Here’s the docker-compose.yml I use to wire everything together:
version: "3.9"

services:
  app:
    build: .
    ports:
      - "3000:3000"
    environment:
      - DATABASE_URL=postgres://devuser:devpass@db:5432/devdb
      - NODE_ENV=development
    depends_on:
      db:
        condition: service_healthy
    volumes:
      - ./:/app
      - /app/node_modules

  db:
    image: postgres:16-alpine
    environment:
      - POSTGRES_USER=devuser
      - POSTGRES_PASSWORD=devpass
      - POSTGRES_DB=devdb
    ports:
      - "5432:5432"
    healthcheck:
      test: ["CMD-SHELL", "pg_isready -U devuser"]
      interval: 5s
      timeout: 5s
      retries: 5
    volumes:
      - pgdata:/var/lib/postgresql/data

volumes:
  pgdata:
The healthcheck on the database is the piece most tutorials skip, and it’s the one that caused me the most headaches before I added it. Without it, your app container can start before Postgres is actually ready to accept connections, and you’ll get flaky “connection refused” errors that are maddening to debug because they only happen sometimes.
The depends_on.condition: service_healthy tells Docker Compose to wait until the healthcheck passes before starting the app container — not just until the database container has started.
Now, anyone on the team can run:
docker compose up
And they get the app, the database, and correct networking between them — with zero manual setup.
Step 3: Automate the Same Environment in GitHub Actions
This is where automation really pays off. Instead of maintaining a separate CI configuration that might drift from your local setup, you point GitHub Actions at the exact same Dockerfile and compose file.
Create .github/workflows/ci.yml:
name: CI

on:
  push:
    branches: [main, develop]
  pull_request:
    branches: [main]

jobs:
  build-and-test:
    runs-on: ubuntu-latest

    steps:
      - name: Checkout code
        uses: actions/checkout@v4

      - name: Set up Docker Buildx
        uses: docker/setup-buildx-action@v3

      - name: Build app image
        uses: docker/build-push-action@v5
        with:
          context: .
          push: false
          tags: myapp:ci
          cache-from: type=gha
          cache-to: type=gha,mode=max

      - name: Start services
        run: docker compose up -d db

      - name: Wait for database
        run: |
          until docker compose exec -T db pg_isready -U devuser; do
            sleep 2
          done

      - name: Run tests
        run: docker compose run --rm app npm test

      - name: Tear down
        if: always()
        run: docker compose down -v
A few details that matter here:
cache-from/cache-to: type=ghauses GitHub Actions’ built-in cache backend for Docker layers. In my experience, this alone cut a 4-minute CI build down to under 40 seconds on subsequent runs.if: always()on teardown ensures containers and volumes get cleaned up even if the tests fail, so you don’t leak resources across runs.- Running tests with
docker compose run --rm app npm testexecutes them inside the exact same container image that will (eventually) run in production. That’s the entire point — no more surprises between “works in CI” and “works in prod.”
Real-World Use Case: Onboarding a New Developer
Here’s what this setup looked like in practice on a project I worked on. Before automation, onboarding a new developer took roughly half a day: installing the right Node version, configuring Postgres, chasing down environment variables, debugging version mismatches.
After switching to this Docker + GitHub Actions setup, onboarding looked like this:
- Clone the repo.
- Copy
.env.exampleto.env. - Run
docker compose up. - Start coding.
That’s it. Total time: under 10 minutes, and most of it was just Docker pulling base images.
Common Errors and How to Fix Them
| Error | Likely Cause | Fix |
|---|---|---|
Cannot connect to the Docker daemon | Docker Desktop isn’t running | Start Docker Desktop, then retry |
port is already allocated | Another process is using the port | Change the host port mapping (e.g., 3001:3000) or stop the conflicting process |
App crashes with ECONNREFUSED to database | Healthcheck missing or app started too early | Add a healthcheck and depends_on.condition: service_healthy |
| Slow rebuilds on every code change | Dependency layer not cached correctly | Copy package*.json before the rest of the source in the Dockerfile |
npm ci fails in container but npm install works locally | package-lock.json out of sync | Run npm install locally, commit the updated lockfile |
| CI passes but local build fails | Different Docker/Compose versions | Pin versions in docker-compose.yml and document required Docker version |
Best Practices I Follow
- Pin every version — base images, dependency versions, and even the Compose file version. “Latest” is convenient until it silently breaks your build.
- Use multi-stage builds for production images to keep the final image small and free of build-time dependencies.
- Never bake secrets into the image. Use environment variables or Docker secrets, and keep
.envfiles out of version control. - Add a
.dockerignorefile. Without one, I’ve accidentally shippednode_modulesand.gitinto images, bloating them and slowing down builds. - Keep the Dockerfile and docker-compose.yml as the single source of truth. If setup instructions live anywhere else, they will eventually go stale.
Performance Considerations
Build time matters more than people expect, especially in CI where you’re paying for compute minutes (or waiting on shared runners). Three changes had the biggest impact for me:
- Layer caching — ordering Dockerfile instructions from least to most frequently changing.
- GitHub Actions cache (
type=gha) — persists Docker layers between workflow runs instead of rebuilding from scratch every time. - Alpine-based images — smaller images pull faster and start faster, which adds up across dozens of CI runs per day.
Security Considerations
A few things I always check before calling a setup “done”:
- Run containers as a non-root user wherever possible.
- Scan images for known vulnerabilities —
docker scout cves myapp:ciis a good starting point. - Never commit
.envfiles; use.env.examplewith placeholder values instead. - Keep base images updated. An outdated Alpine or Node base image can carry known CVEs long after they’re patched upstream.
Docker Compose vs Dev Containers vs Cloud IDEs
| Approach | Setup Speed | Team Consistency | Local Resource Usage | Best For |
|---|---|---|---|---|
| Docker Compose | Fast | High | Moderate | Full-stack apps with multiple services |
| VS Code Dev Containers | Fast | Very High | Moderate | Teams standardized on VS Code |
| GitHub Codespaces | Instant | Very High | None (cloud-based) | Distributed teams, quick onboarding |
| Manual local setup | Slow | Low | Low | Small, single-service projects only |
I still reach for plain Docker Compose most often because it’s editor-agnostic and works identically whether you’re on VS Code, JetBrains, or Vim.
Checklist Before You Ship This Setup
- [ ] Dockerfile pins exact base image version
- [ ]
.dockerignoreexcludesnode_modules,.git, and.env - [ ]
docker-compose.ymlincludes healthchecks for dependent services - [ ] GitHub Actions workflow builds from the same Dockerfile used locally
- [ ] CI caching enabled (
type=gha) - [ ] Secrets are never committed to the repository
- [ ] README replaced with a one-command setup instruction
Frequently Asked Questions
Do I need to know Docker deeply to follow this guide? No. You need to understand basic commands like docker compose up and docker build. The Dockerfile and compose file in this guide are ready to copy and adapt.
Will this work for languages other than Node.js? Yes. The pattern — Dockerfile plus docker-compose.yml plus a GitHub Actions workflow that builds the same image — applies to Python, Go, Java, Ruby, or any language. Only the base image and startup command change.
Why use GitHub Actions instead of Jenkins or CircleCI? GitHub Actions lives directly in your repository, requires no separate infrastructure to maintain, and has a generous free tier for public and small private repos. If your team already hosts code on GitHub, it removes an entire category of setup overhead.
How do I handle environment variables and secrets safely? Use a .env file locally (excluded from Git via .gitignore) and GitHub Actions’ encrypted repository secrets for CI. Never hardcode credentials into the Dockerfile or compose file.
My build works locally but fails in GitHub Actions. Why? This is almost always a caching or version mismatch issue. Check that you’re pinning the same base image version locally and in CI, and confirm your GitHub Actions runner has enough resources for the build.
Can I use this same setup for production deployment? The Dockerfile can absolutely be reused for production, though I recommend a multi-stage build to strip out dev dependencies and keep the final image lean. The docker-compose.yml shown here is tuned for local development — production typically calls for orchestration tools like Kubernetes or ECS instead of Compose.
Final Summary
Automating your local development environment with Docker and GitHub Actions comes down to one principle: stop documenting your environment, and start executing it. A well-structured Dockerfile, a docker-compose.yml with proper healthchecks, and a GitHub Actions workflow that reuses both give you a setup that’s fast, reproducible, and consistent from your laptop all the way to CI.
If you found this useful, I write regularly about DevOps, CI/CD, and backend engineering practices like this one — take a look at more tutorials and guides here on SpiritCode.blog, and subscribe if you’d like these breakdowns delivered as I publish them.