
Meta description: I built a local file backup server with Raspberry Pi in a weekend — here’s my exact setup, the tools I used, and the gotchas that nearly cost me a night of sleep.
Last updated: June 2025
Introduction
A few months ago, my wife’s laptop drive failed without warning. We recovered most of her files from iCloud, but about two weeks of photos and work documents were gone for good. That was the day I stopped procrastinating and finally set up a Raspberry Pi home server for local file backup. I’d been meaning to do it for years — turns out it takes one bad Friday afternoon to actually get motivated.
Since then, I’ve backed up three machines automatically every night, and I’ve tested a full restore twice. The setup cost me under $100 and runs on a Pi 4 that draws about 5 watts idle. If you want something that works reliably without paying for a NAS or trusting a cloud service with sensitive data, this guide is exactly what I wish existed when I started.
TL;DR
- A Raspberry Pi 4 with an external USB drive and rsync over SSH gives you a fully automated local backup server for under $100.
- You configure cron jobs on client machines to push backups nightly, with versioned snapshots using
rsync --link-dest. - The biggest gotcha is filesystem format: always format your backup drive as ext4, not exFAT, or hard links for versioning will silently fail.
Why a Local Backup Server Still Makes Sense in 2025
Cloud backup is convenient, but it has real limits. Upload speeds on most home connections make the first full backup of a 500 GB library take days. Privacy-sensitive documents — tax records, medical files, legal work — feel uncomfortable on someone else’s infrastructure. And when your internet is down, your cloud backup is unreachable.
A local server gives you LAN-speed restores (typically 100–500 MB/s on Gigabit ethernet vs. 5–10 MB/s from the cloud), full control over retention policy, and zero monthly cost after hardware. I run mine alongside cloud backup for the 3-2-1 strategy — three copies, two media types, one offsite.
[INTERNAL LINK: related article — 3-2-1 backup strategy for developers]
Prerequisites
Before you start, make sure you have:
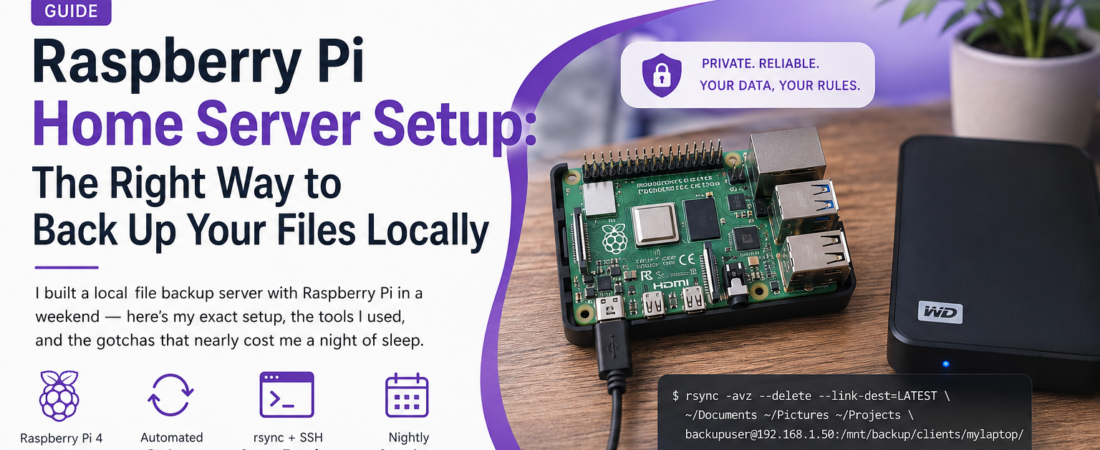
- Raspberry Pi 4 (2 GB RAM minimum; I use the 4 GB model)
- A microSD card (16 GB+) for the OS
- An external USB hard drive or SSD (I use a 2 TB WD Elements)
- A network switch or router with an available Ethernet port
- Basic Linux/SSH familiarity
- Client machines running Linux or macOS (Windows users can use WSL2 or cwRsync)
[SOURCE: https://www.raspberrypi.com/documentation/]
How to Set Up a Raspberry Pi Home Server for File Backup
Step 1: Flash and Configure Raspberry Pi OS Lite
I always use Raspberry Pi OS Lite (64-bit, Bookworm) — no desktop environment means less RAM usage and fewer attack vectors. Flash it with Raspberry Pi Imager and configure SSH, hostname, and your user credentials directly in the imager before writing.
# After first boot, update the system
sudo apt update && sudo apt upgrade -y

# Set a static IP (edit /etc/dhcpcd.conf)
sudo nano /etc/dhcpcd.conf
Add these lines at the bottom of dhcpcd.conf, adjusting for your network:
interface eth0
static ip_address=192.168.1.50/24
static routers=192.168.1.1
static domain_name_servers=1.1.1.1
Reboot and confirm with hostname -I. A static IP is non-negotiable — if the Pi’s address changes, every client’s cron job breaks silently.
Step 2: Format and Mount the Backup Drive
Plug in your USB drive and identify it:
lsblk
# Typically shows as /dev/sda
Format as ext4 (critical — see the TL;DR gotcha):
sudo mkfs.ext4 /dev/sda1
sudo mkdir -p /mnt/backup
sudo mount /dev/sda1 /mnt/backup
Make the mount permanent by adding it to /etc/fstab. Get the UUID first:
sudo blkid /dev/sda1
# Output: /dev/sda1: UUID="a1b2c3d4-..." TYPE="ext4"
Then add to /etc/fstab:
UUID=a1b2c3d4-xxxx-xxxx-xxxx-xxxxxxxxxxxx /mnt/backup ext4 defaults,nofail 0 2
The nofail option is important: without it, if the drive isn’t plugged in on boot, the Pi won’t start properly.
Step 3: Create a Dedicated Backup User
Never use your main account for rsync access. Create a restricted user:
sudo adduser backupuser
sudo mkdir -p /mnt/backup/clients
sudo chown -R backupuser:backupuser /mnt/backup/clients
On each client machine, generate an SSH key pair and copy the public key to the Pi:
# On the client
ssh-keygen -t ed25519 -C "backup-client-laptop"
ssh-copy-id backupuser@192.168.1.50
Security Note: Restrict
backupuserto rsync-only by addingcommand="rsync --server ..."in~/.ssh/authorized_keys. This prevents the backup user from being used as a general SSH entry point if a client machine is compromised. [SOURCE: https://man.openbsd.org/sshd_config]
Step 4: Set Up Versioned Backups with rsync and Hard Links
This is the part most tutorials skip. Basic rsync copies files, but versioned snapshots let you recover files from any previous day without storing full duplicate copies. The trick is --link-dest, which hard-links unchanged files from the previous snapshot instead of copying them.
Create a backup script on each client machine:
#!/bin/bash
# backup.sh — save to ~/scripts/backup.sh

DATE=$(date +%Y-%m-%d)
DEST="backupuser@192.168.1.50:/mnt/backup/clients/mylaptop"
LATEST="$DEST/latest"
SNAPSHOT="$DEST/$DATE"

rsync -avz --delete \
  --link-dest="$LATEST" \
  --exclude='.cache' \
  --exclude='node_modules' \
  --exclude='*.tmp' \
  ~/Documents ~/Pictures ~/Projects \
  "$SNAPSHOT"

# Update the 'latest' symlink on the server
ssh backupuser@192.168.1.50 "ln -snf /mnt/backup/clients/mylaptop/$DATE /mnt/backup/clients/mylaptop/latest"
Make it executable:
chmod +x ~/scripts/backup.sh
Step 5: Schedule Automated Backups with Cron
Open the client’s crontab:
crontab -e
Add a nightly job at 2:00 AM:
0 2 * * * /home/youruser/scripts/backup.sh >> /var/log/backup.log 2>&1
Check /var/log/backup.log after the first run to confirm it completed successfully. I was surprised to find an error on my first run: rsync: [sender] send_files failed to open "/home/user/Pictures/Photo Library.photoslibrary" (in files): Permission denied (13). The fix was adding --exclude='*.photoslibrary' — macOS locks that bundle while Photos is running.
Step 6: Monitor Disk Usage on the Pi
Set up a simple cron job on the Pi itself to warn you when the backup drive hits 80% capacity:
# On the Pi — add to Pi's crontab
0 6 * * * df /mnt/backup | awk 'NR==2 {if ($5+0 > 80) print "WARNING: Backup drive at "$5" capacity"}' | mail -s "Backup Disk Alert" you@example.com
Real-World Tips I Use in Production
Retention policy matters. I keep daily snapshots for 7 days, weekly for 4 weeks, and monthly for 3 months. A small cleanup script on the Pi handles this every Sunday. Without a retention policy, a 2 TB drive fills faster than you’d expect.
Test your restores. I do a full restore test every 90 days — pick a random subdirectory, pull it to a temp folder, and verify the files. A backup you’ve never tested is just optimism.
Use Tailscale for offsite access. I installed Tailscale on the Pi so I can reach it from anywhere on my phone or laptop. Setup takes about 5 minutes and the free tier covers personal use easily.
Common Errors and How I Fixed Them
Error: rsync: failed to set times on "/mnt/backup/...": Operation not permitted (1) Cause: The backup drive was mounted as FAT32. Solution: reformat as ext4. Hard links and proper POSIX timestamps require a Linux-native filesystem.
Error: SSH connection refused after Pi reboot Cause: The USB drive wasn’t mounting on boot because I forgot nofail in fstab. The Pi booted into emergency mode. Solution: add nofail to the fstab entry and reboot.
Error: Backup runs fine but old snapshots are identical file sizes (no deduplication) Cause: --link-dest path was wrong — I was passing a relative path. rsync silently fell back to a full copy. Solution: always use absolute paths in --link-dest.
FAQ
Q: What is the best Raspberry Pi model for a home backup server? A: The Raspberry Pi 4 with 2 GB RAM is the minimum I’d recommend for a backup server. The USB 3.0 ports on the Pi 4 are essential — the Pi 3’s USB 2.0 caps transfer speeds around 35 MB/s, which makes backing up large files painfully slow. If you’re serving multiple clients simultaneously, the 4 GB model is worth the small price difference.
Q: How do I set up automatic file backup from Windows to a Raspberry Pi server? A: On Windows, the easiest path is installing WSL2 and running rsync from within the Linux environment. Alternatively, DeltaCopy (a Windows rsync wrapper) works without WSL. You’ll need to copy your SSH public key to the Pi just like on Linux/macOS. I’d recommend WSL2 since it gives you a real bash environment for scripting.
Q: How much storage do I need on my Raspberry Pi backup drive? A: With versioned snapshots and hard links, storage use is roughly 1.2–1.5× the size of your source data for 30 days of daily snapshots, assuming files don’t change drastically every day. For a 200 GB source, plan on 300–400 GB. A 1 TB drive comfortably handles one or two laptops; a 2 TB drive is better if you’re backing up multiple machines.
Q: Is a Raspberry Pi home server secure enough for sensitive file backups? A: With proper hardening — SSH key authentication only (no passwords), a dedicated restricted backup user, UFW firewall allowing only port 22, and keeping the OS updated — it’s reasonably secure on a home LAN. I wouldn’t expose it directly to the internet. Use Tailscale or a VPN if you need remote access.
Q: How do I restore files from a Raspberry Pi rsync backup? A: Restoring is just rsync in reverse. From any client: rsync -avz backupuser@192.168.1.50:/mnt/backup/clients/mylaptop/2025-05-20/Documents/ ~/Restored/. You can browse snapshots by date and restore any specific folder or file. No special software needed — that simplicity is one of rsync’s biggest advantages.
Conclusion
Setting up a Raspberry Pi home server for local file backups is one of the highest-value weekend projects I’ve done as a developer. It costs under $100, runs silently in a corner, and gives you genuine peace of mind. The combination of rsync with --link-dest versioning is elegant in its simplicity — no proprietary software, no subscriptions, no lock-in.
About the Author
I’m a software engineer with over 10 years of experience building and maintaining production infrastructure across web, DevOps, and embedded systems. My personal stack runs heavy on Linux, Python, and Bash automation — and I’ve been self-hosting services at home since before “homelab” was a subreddit. I write at SpiritCode to share the practical knowledge that took me years to accumulate, so you don’t have to learn it the hard way.